 |
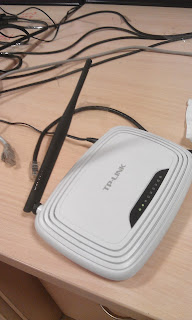
| TP-LINK TL-WR740N WiFi Router |
Here's how to:
- Flash a TP-LINK TL-WR740N WiFi router with OpenWRT (Wikipedia)
- Install toolchain which will run on your x86 Ubuntu computer but compile for the MIPS processor (Atheros AR9330) present inside the TP-LINK TL-WR740N.
- Cross-compile a hello world C program on x86.
- Transfer the executable to the router and run it.
Flashing the router with OpenWRT
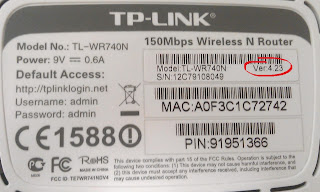 |
| Figuring out the model number |
- Look on the back side of the router and figure out your model number
- Mine was V4.23. I looked up the corresponding entry for that model on the OpenWRT's Wiki Page for TL-WR740N here http://wiki.openwrt.org/toh/tp-link/tl-wr740n under the "Specific Install Notes" section and read:
"Hardware version 4.23 works perfectly with the unmodified Attitude Adjustment (12.09-beta) generic WR740N v4 image. The best installation method is flashing it through the stock TP-Link web interface."
- So I clicked on the image link in that line and downloaded the .bin file:
openwrt-ar71xx-generic-tl-wr740n-v4-squashfs-factory.bin
- Next I connected my WiFi router to my computer using an Ethernet cable and booted up the router. Make sure to disable all other network interfaces (WiFi or Ethernet) except for the wired one between the WiFi Router and your PC.
- Use a web browser to login to your routers web management interface and navigate to System Tools > Firmware Upgrade.
- Browse and select the .bin file for the OpenWRT and click on the "Upgrade" button.
- Wait for the router to finish the firmware flashing process. You will know when its done when two particular LEDs turn back on: one shaped like the Sun or a cog. And the other one shaped like a computer monitor with a number inside it - the number being the Ethernet port number to which you connected your computer. Once that happens, login again to the web management GUI - this time it will be the OpenWRT one. The default IP address for a router newly flashed with OpenWRT is 192.168.1.1. Login with the default password: "root".
 |
LEDs which turn back on when the flashing is done
and the router had completed booting |
- The router will ask you to set a new password for the "root" user, do so under System > and then reboot using the OpenWRT web interface itself.
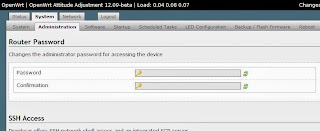 |
| Setting root password for OpenWRT Router |
Installing the toolchain and compiling a hello world C program
- We need to know which toolchain to download, so before we do that we can SSH (using PuTTY) into the router and confirm some system information.
- Using PuTTY connect to your router. Enter the IP address as 192.168.1.1 (default one) or any new one that you might have set.
- When the connection succeeds, login as "root" and then enter whatever password you had set for the router in the previous step. You will be presented with a welcome screen:
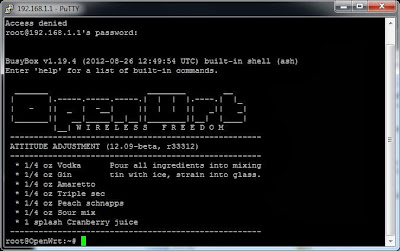 |
| OpenWRT Welcome screen |
- Note from the welcome screen that my OpenWRT distribution version is "ATTITUDE ADJUSTMENT 12.09-beta"
- Now you can issue a the following commands to gain some more information regarding the information, these
cat /proc/cpuinfo
uname -a
ls /lib
These commands will give you the processor architecture and the libc version number incase you decide to use a different GCC toolchain other than the one provided by OpenWRT. My processor has a MIPS Big Endian core (and NOT an ARM core). I know its a MIPS big endian and not MIPS little endian because the cpu model says "MIPS" and not "mipsel". The router has uClibc and not the full-fledged libc on it. The uclibc version is 0.9.33.2. The Linux kernel version on my router is 3.3.8.
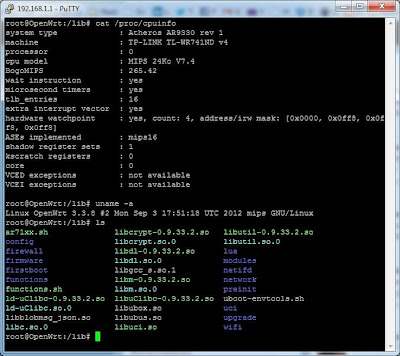 |
| Gathering system information |
- Now I have enough info to visit http://downloads.openwrt.org and navigate to the SDK corresponding to this version. In my case this was:
http://downloads.openwrt.org/attitude_adjustment/12.09-beta/ar71xx/generic/OpenWrt-SDK-ar71xx-for-linux-i486-gcc-4.6-linaro_uClibc-0.9.33.2.tar.bz2
Its 584 MB in size.
- I downloaded it to my x86 Ubuntu PC and extracted it to a folder on my hard drive using the command:
tar xvjf OpenWrt-SDK-ar71xx-for-linux-i486-gcc-4.6-linaro_uClibc-0.9.33.2.tar.bz2 -C ~/openwrt
Make sure to cd to the folder where you have placed the tar.bz2 file and that the target firectory (~/openwrt in my case) exists before you extract. The files will take up around 2.1 GB of space on your hard drive.
- Next I figured out the bin folder were the gcc and ld executables are placed, in my case this was:
~/openwrt/OpenWrt-SDK-ar71xx-for-linux-i486-gcc-4.6-linaro_uClibc-0.9.33.2/staging_dir/toolchain-mips_r2_gcc-4.6-linaro_uClibc-0.9.33.2/bin
- Two system variables (PATH and STAGING_DIR) must be set before we can use the tools present at this path. Issue the following commands:
export PATH=~/openwrt/OpenWrt-SDK-ar71xx-for-linux-i486-gcc-4.6-linaro_uClibc-0.9.33.2/staging_dir/toolchain-mips_r2_gcc-4.6-linaro_uClibc-0.9.33.2/bin:$PATH
export STAGING_DIR=~/openwrt/OpenWrt-SDK-ar71xx-for-linux-i486-gcc-4.6-linaro_uClibc-0.9.33.2/staging_dir
- Now you are ready to compile using this new toolchain. Issue the command "gedit hello.c" and type out a hello world program and save it:
1
2
3
4
| #include<stdio.h>
main() {
printf("Hello World\n");
}
|
- Compile the program by issuing the command:
mips-openwrt-linux-gcc hello.c -o hello
Copying the executable to the router
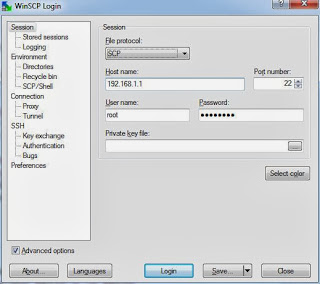 |
| Connect using WinSCP to transfer the executable to the router |
- To copy the "hello" executable onto the router, I moved the file to my Windows PC and used WinSCP to copy it to the home directory on the router. If you want to copy the file to the router from your Linux PC, use any of the methods, described here. Make sure to set the protocol to "SCP". The login name would be "root" and the password the one you set just after flashing the router with OpenWRT.
- Once the file is copied to the router, use PuTTY to SSH into the router.
- Change the file permissions of "hello" to make it executable by issuing the following command via the PutTTY terminal: chmod +x hello
- Now execute the program by issuing the command: ./hello
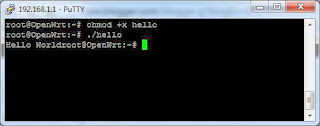 |
| Great Success!! |
Reference:
- Haros's post here: http://www.dd-wrt.com/phpBB2/viewtopic.php?t=61112


Comments
Post a Comment